For generations, Kiwis have cherished the warmth and social interaction of gathering around outdoor firepits. These spaces are where friendships flourish, stories are shared, and memories are made. While our ancestors may have gathered around primitive flames, today, we have the luxury of crafting inviting outdoor firepit areas right in our own backyards. If you’re thinking of creating your own outdoor firepit oasis, you might wonder how to keep the surrounding area dry and comfortable, especially during New Zealand’s changeable weather.
In this guide, we’ll explore a fantastic DIY solution for constructing permeable paving areas around your outdoor firepit using PebbleLock permeable pavers. This innovative solution ensures that you can enjoy the company of friends and family around your firepit, rain or shine.
What is Permeable Paving, and Why Does it Suit Kiwi Backyards?
Permeable paving is an ideal choice for Kiwi backyards, particularly those with outdoor firepits. Unlike traditional paving options, permeable paving, such as PebbleLock, offers several advantages:
- Easy installation.
- Cost-effectiveness.
- Allows water to pass through, preventing pooling and maintaining a dry surface.
- Environmentally friendly, as it’s made from 100% recycled plastic.
- Features a honeycomb design that secures pebbles in place, creating a sturdy surface.
- Redirects water back into the soil, reducing runoff and erosion.
- Aesthetic appeal, with customisable shapes and designs to suit your backyard’s style.
How to Build Your Outdoor Firepit Patio

Let’s walk through the steps of creating your own firepit patio using permeable paving:
Step 1: Excavate the Area
Mark out the desired space for your firepit patio and excavate it to a depth of 100mm to 200mm. Ensure the area is flat and free from debris.
Step 2: Lay Geotextile
Line the excavated area with SureTex Geotextile to separate the soil from the aggregate layers and prevent sinking. Secure the geotextile in place using Strol flathead WeedMat Pins.
Step 3: Add Drainage Aggregate
Spread a layer of drainage aggregate (GAP20) evenly across the geotextile. Compact the aggregate to create a level surface and mark out the location of your firepit.
Step 4: Install Pavers
Begin laying PebbleLock pavers, starting from one corner and working your way across. Use a clip system to secure the pavers in place and cut them as needed to fit around obstacles or edges.
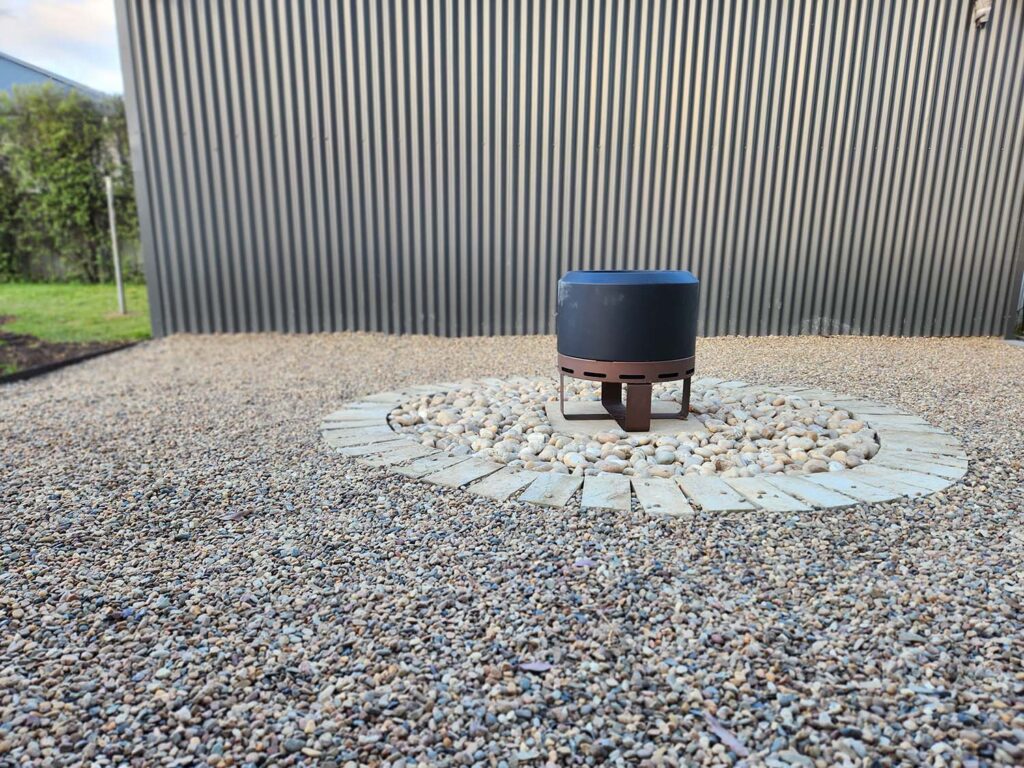
Step 5: Apply Decorative Stones
Cover the pavers with decorative stones, filling the gaps until the pavers are no longer visible. Consider adding larger stones in the center of the firepit for visual appeal.
Step 6: Enjoy Your Outdoor Firepit
With your firepit patio complete, it’s time to gather your friends and family, pour some wine, and enjoy the warmth and ambiance of your outdoor firepit.
Creating a dry, comfortable outdoor space around your firepit is essential for year-round enjoyment. By using permeable paving solutions like PebbleLock, you can ensure that your firepit area remains inviting and accessible, regardless of the weather. So, why not embark on this DIY project and transform your backyard into a cozy haven for relaxation and socialising?